Winglets and Canopy

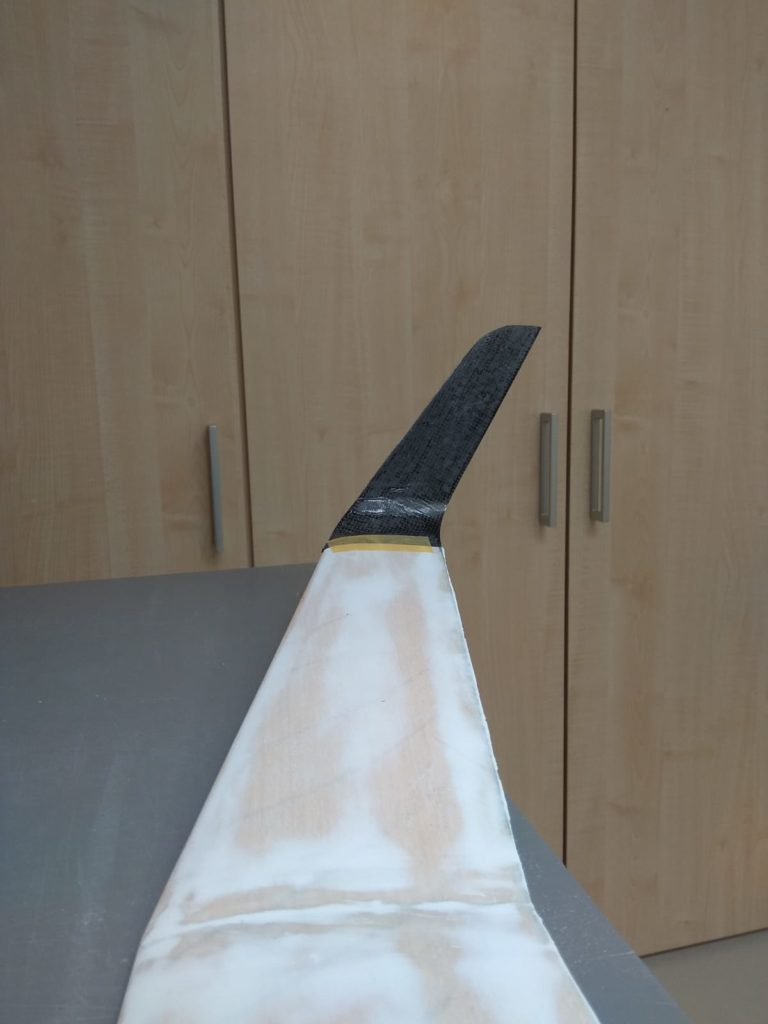
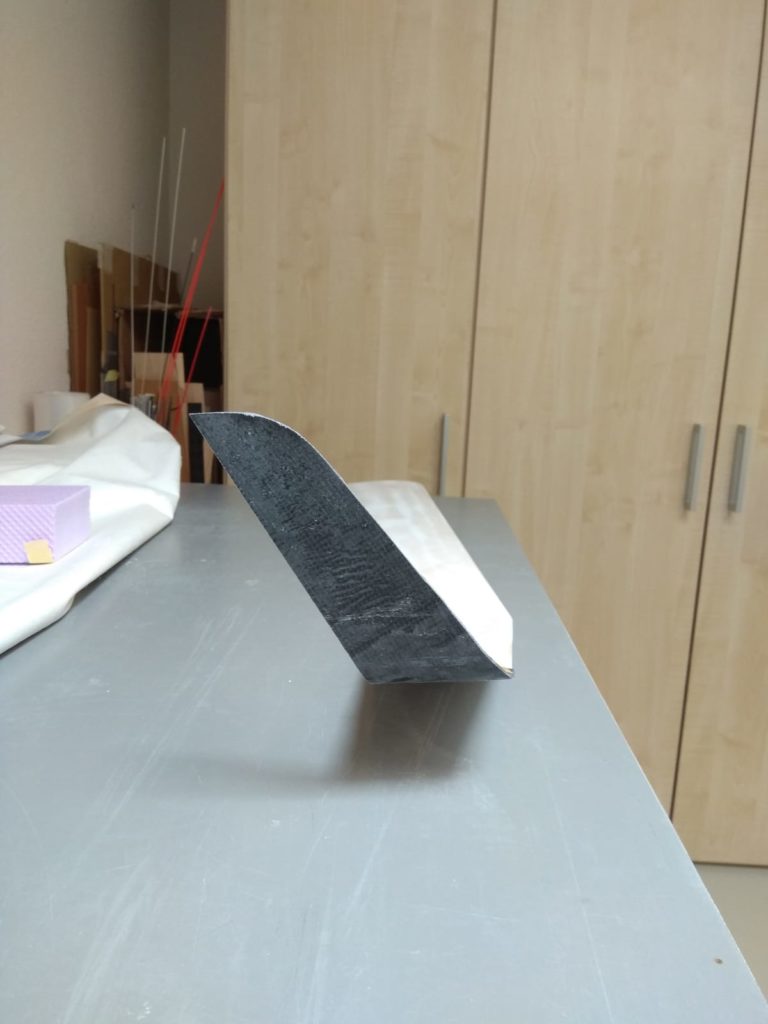
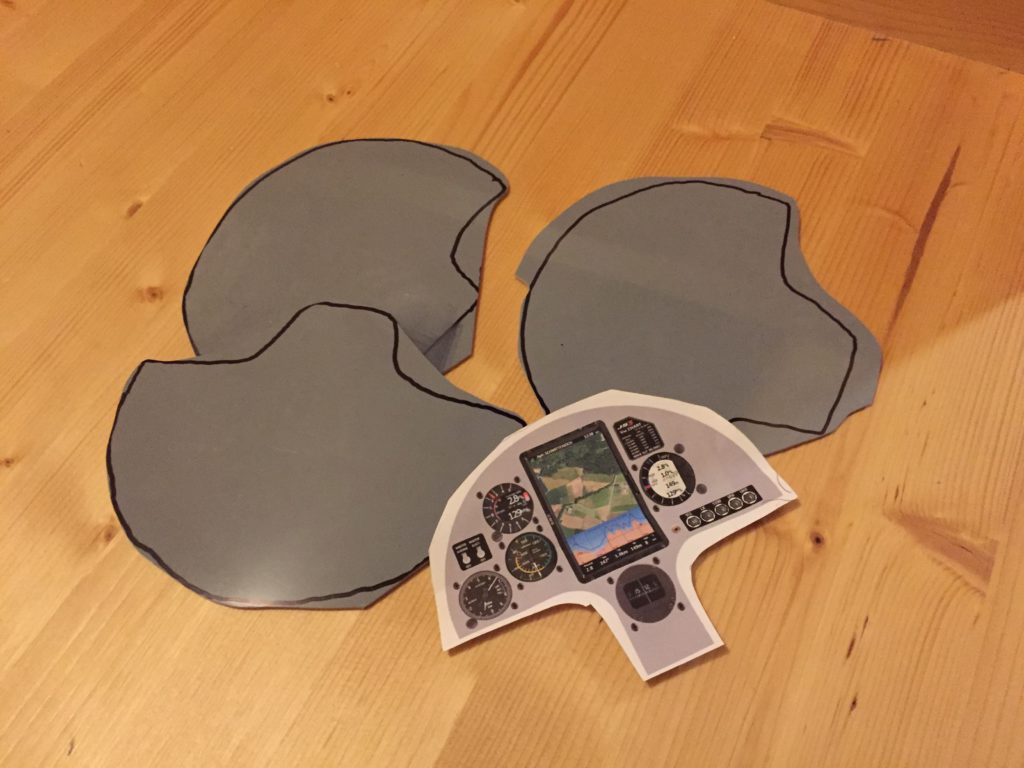
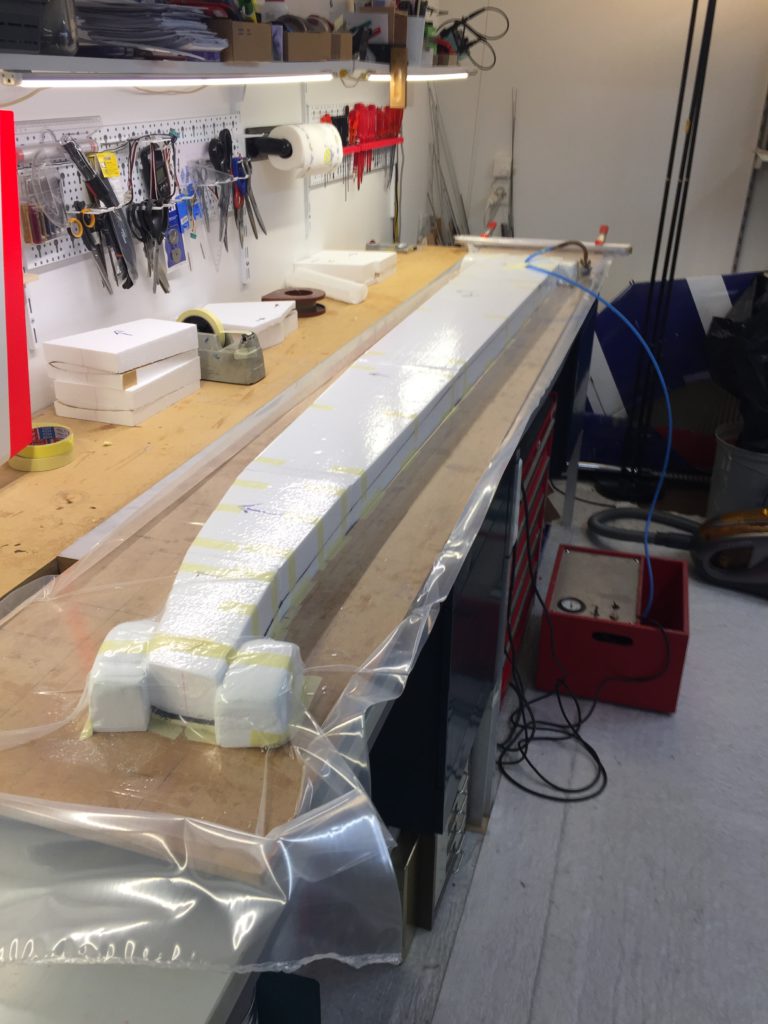
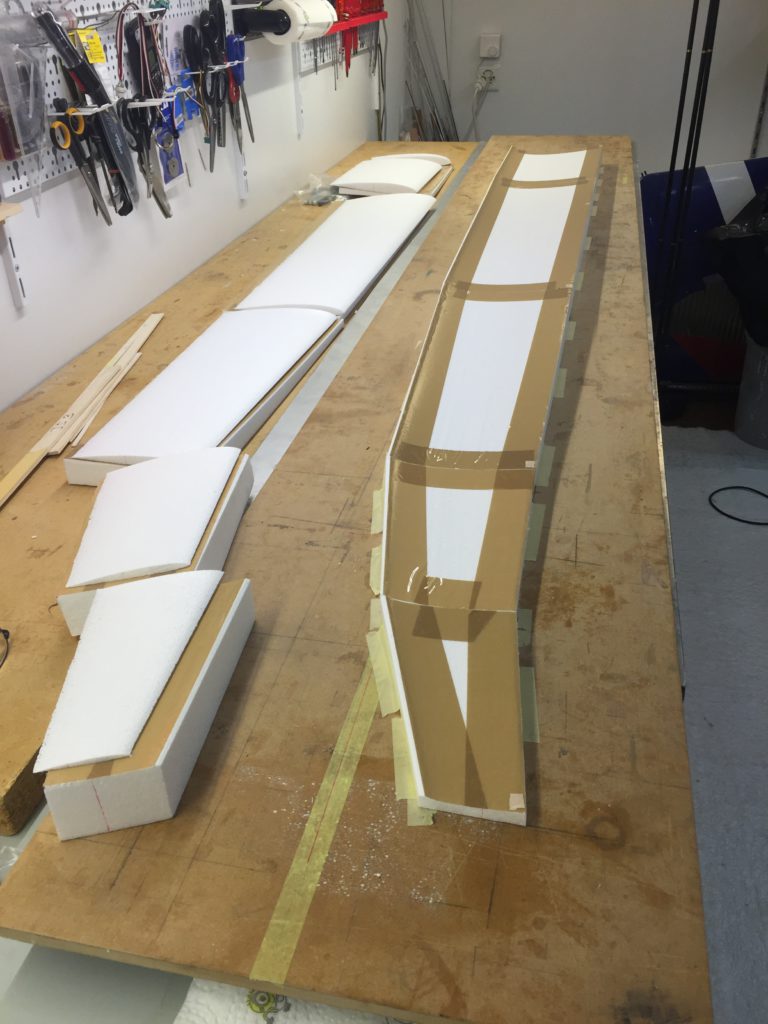
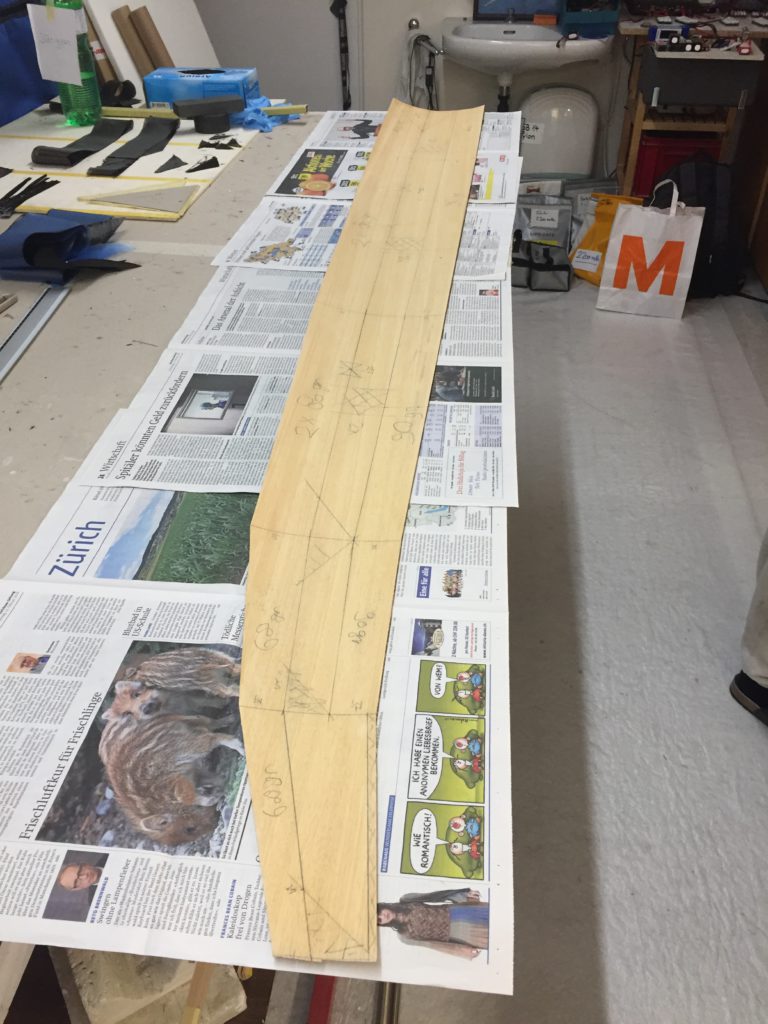
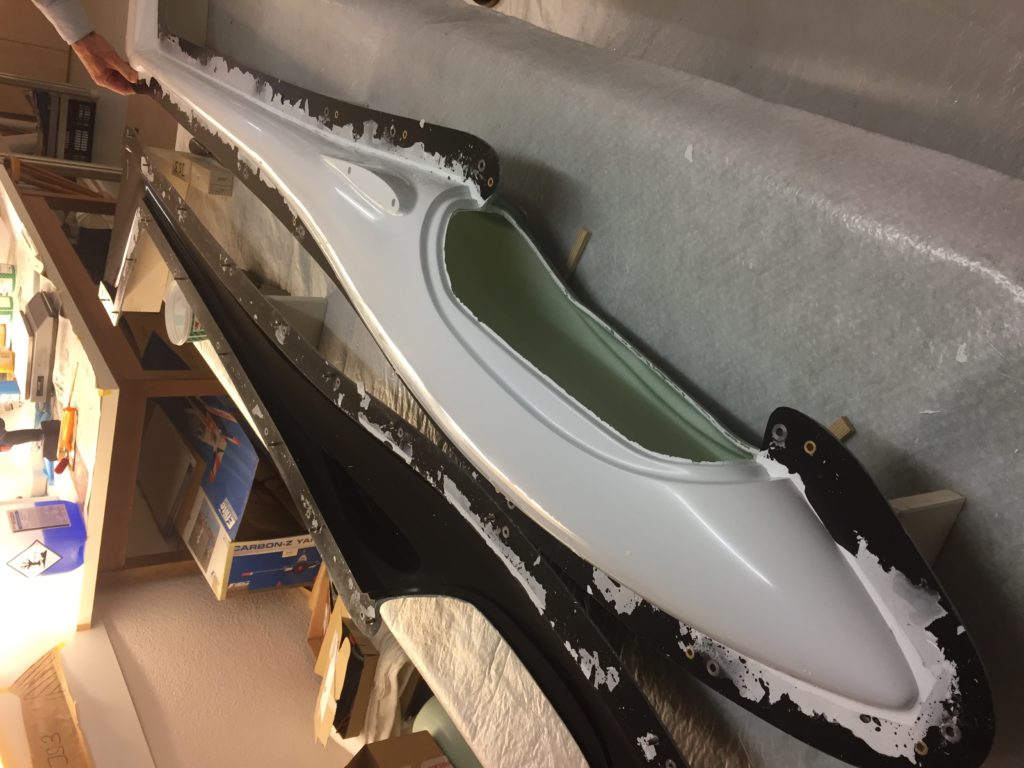
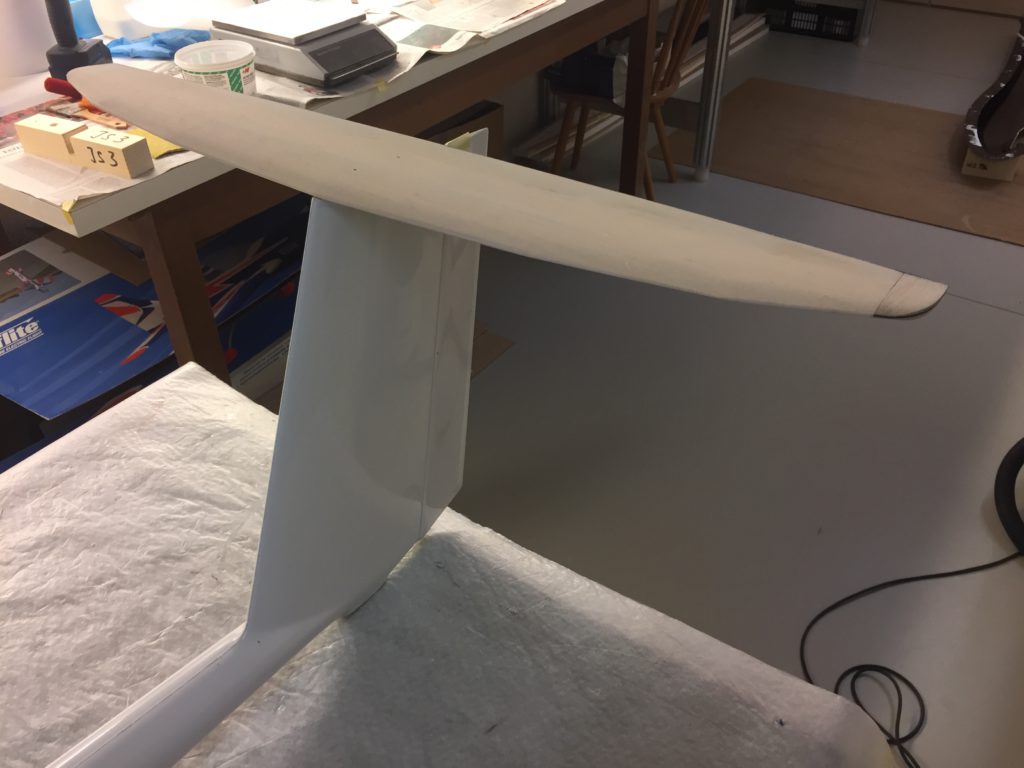
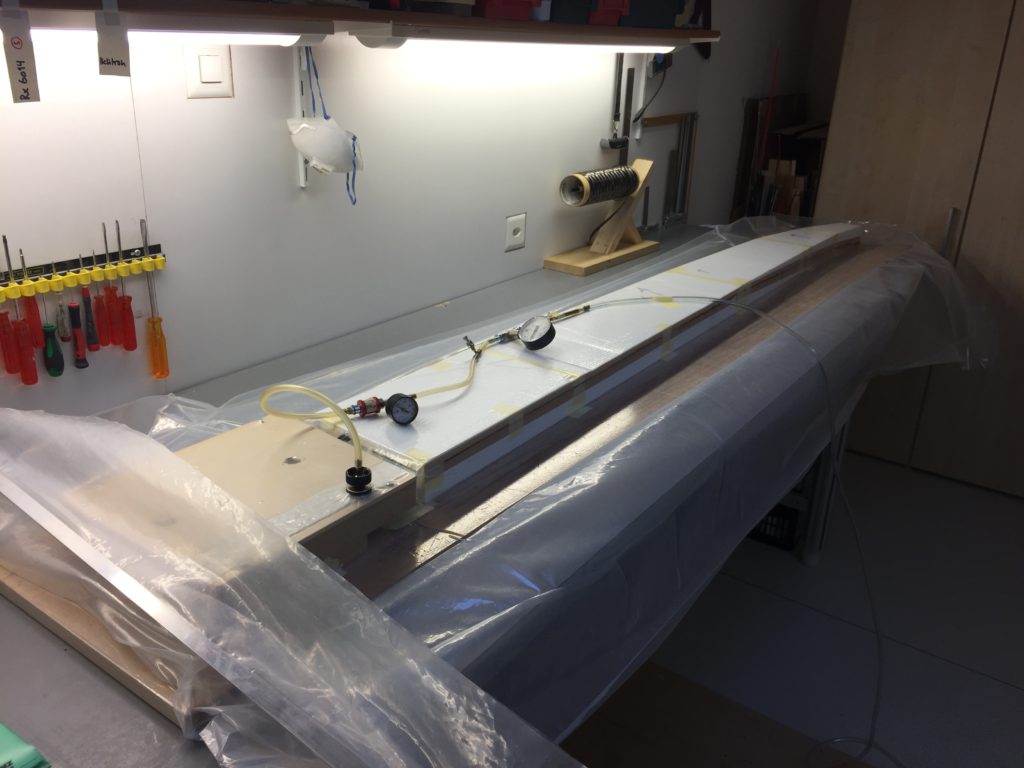
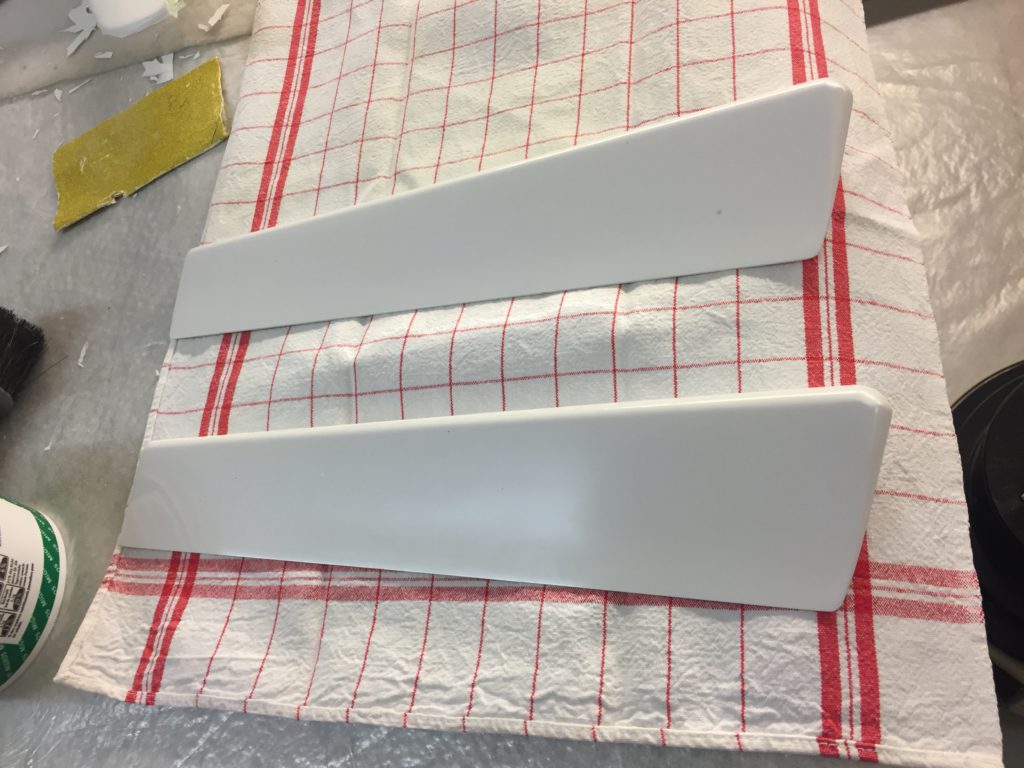
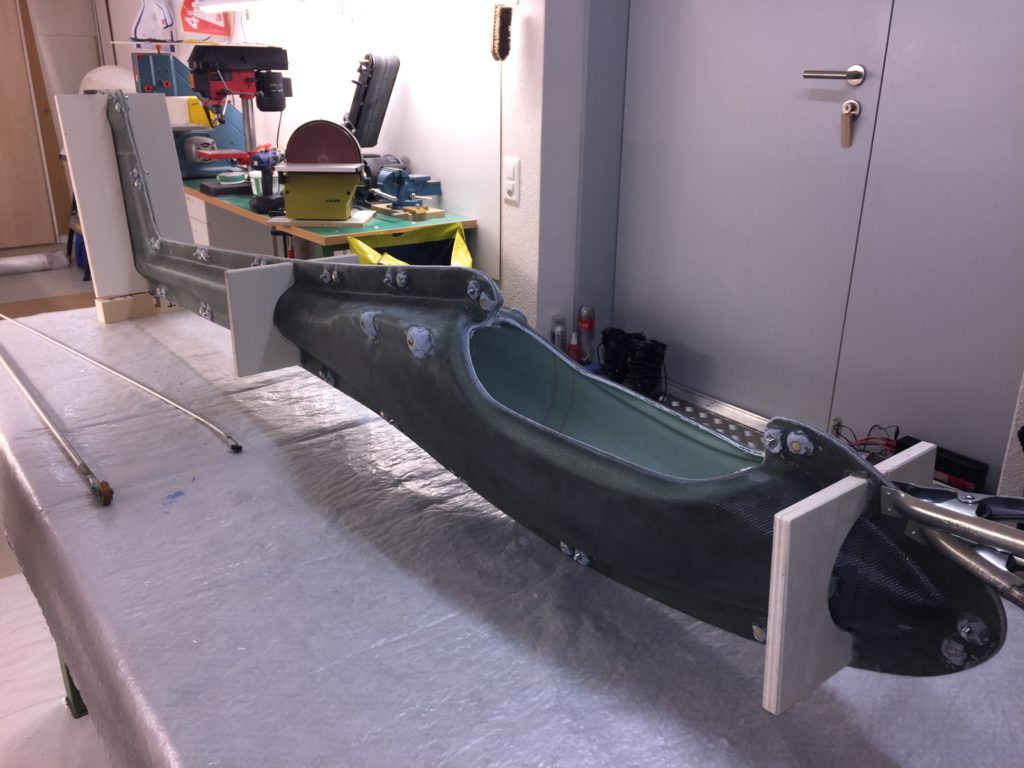
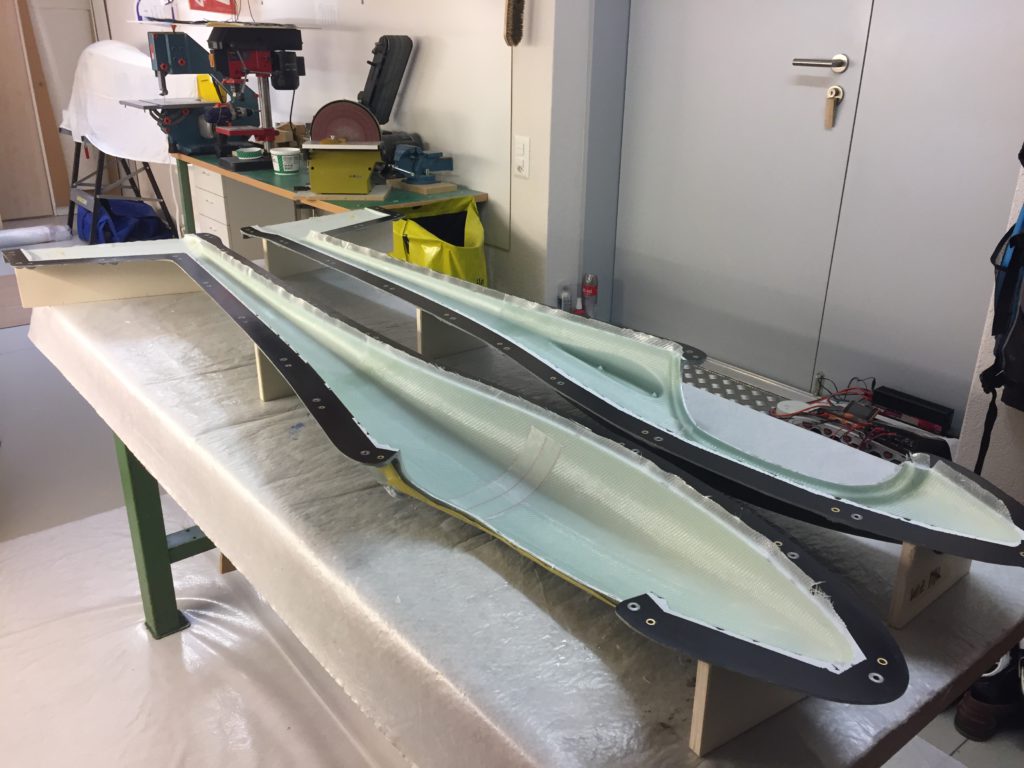
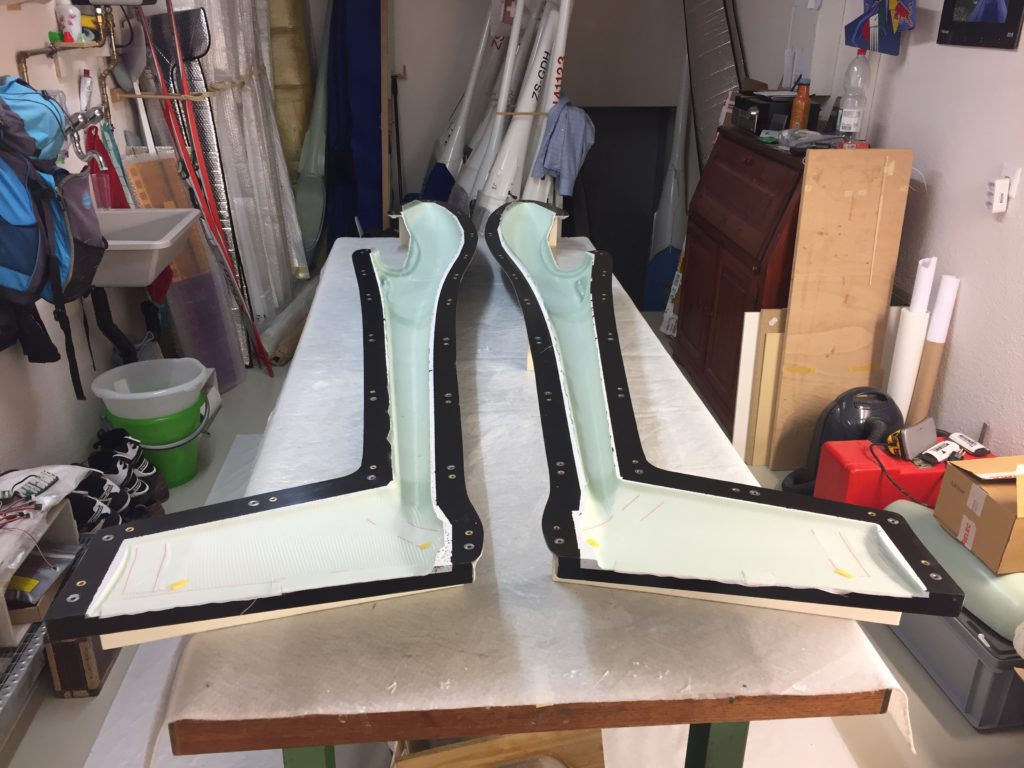
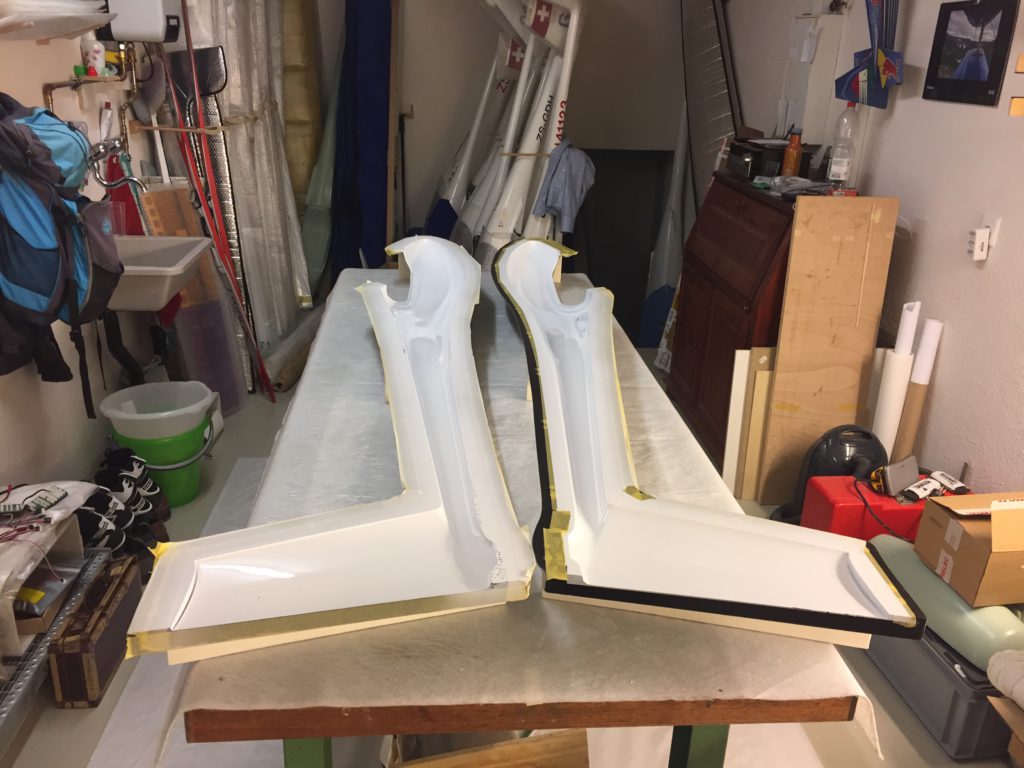
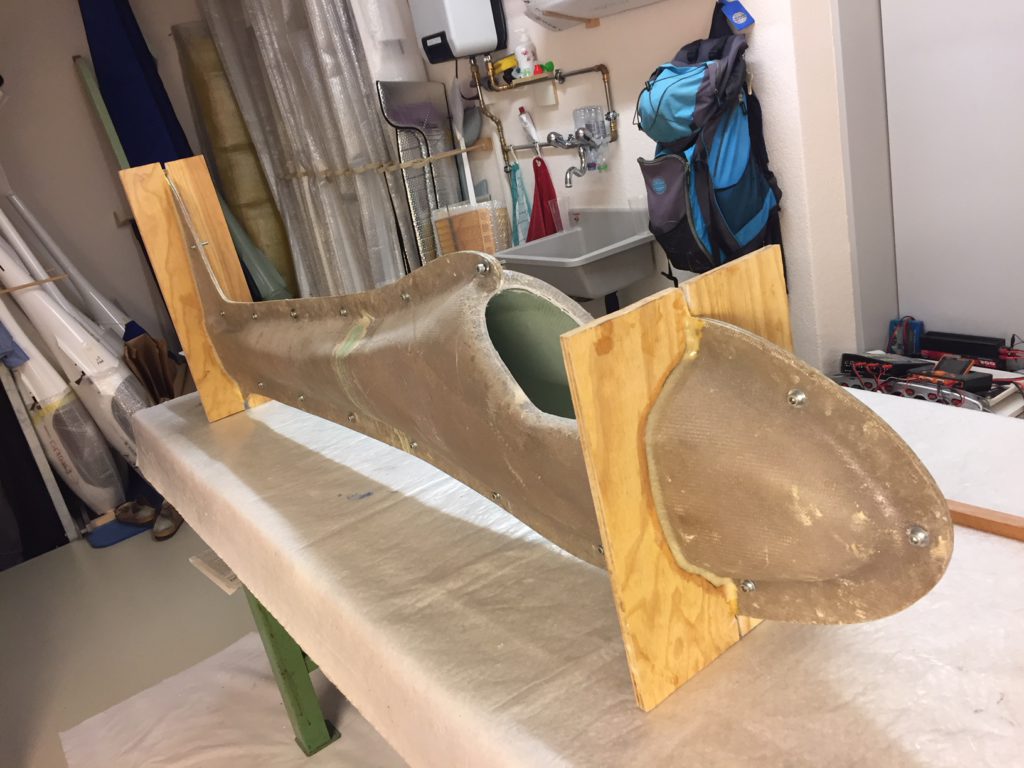
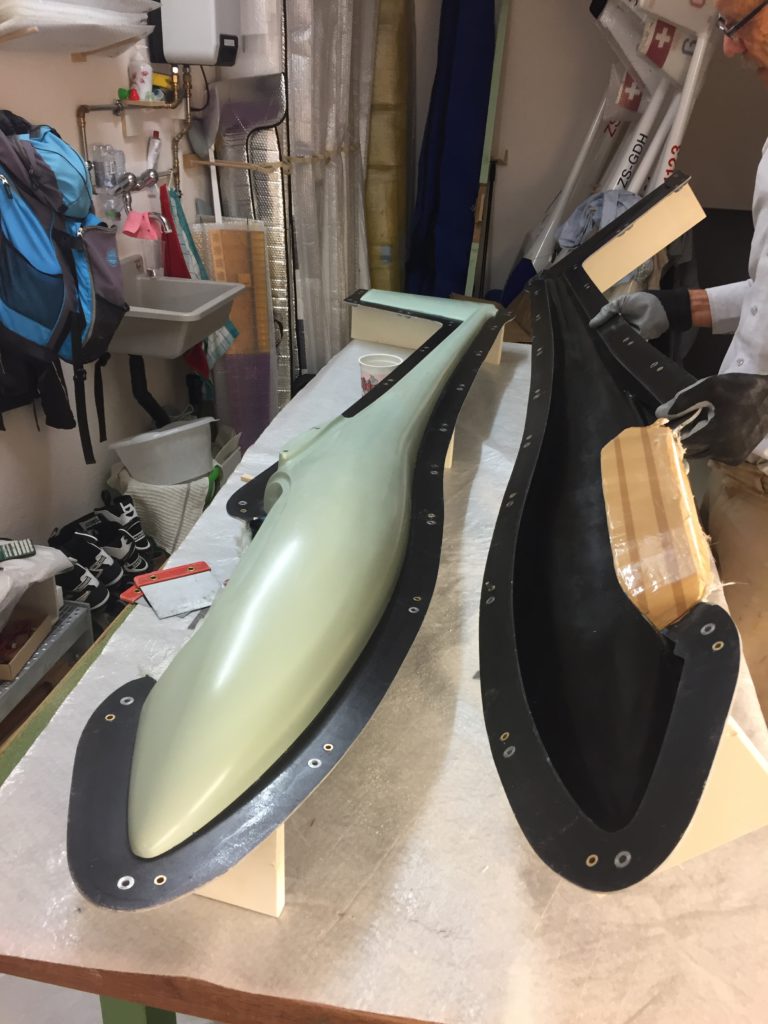
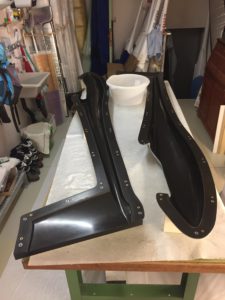
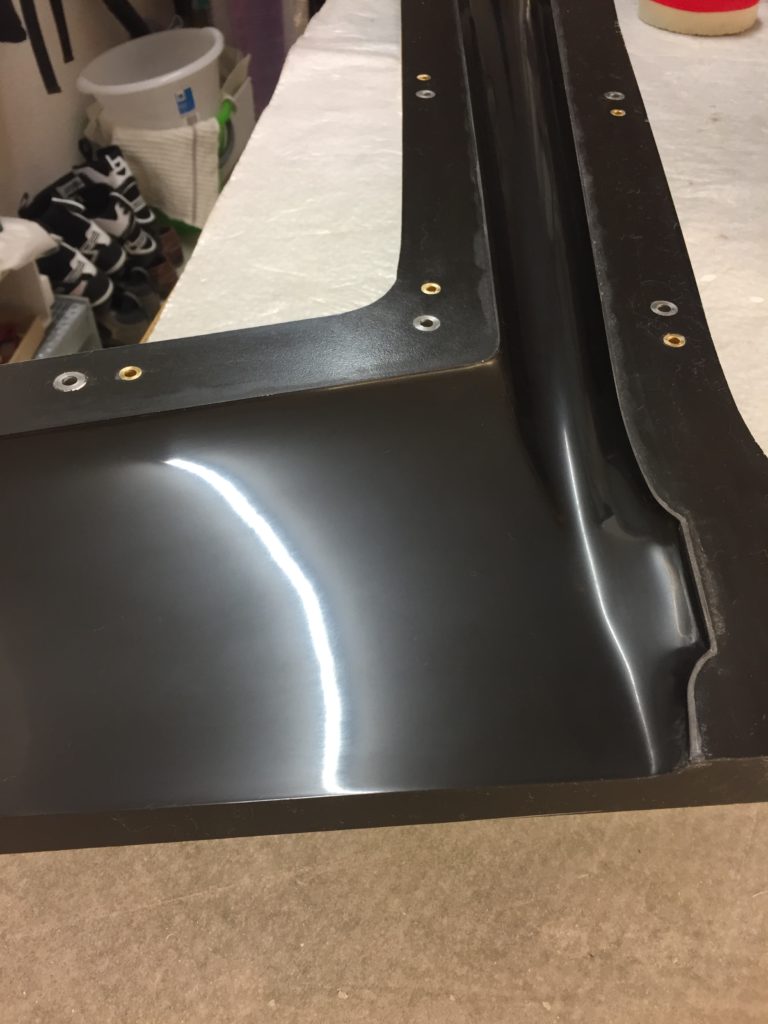
Georg is moving ahead quite fast on his JS3. He has finished designing and making simple moulds for the winglets. He tried to produce a single set of winglets that we could use for both wing sizes, but unfortunately that’s proven to be impossible. So we will need to produce two pairs per plane. Georg’s first trial set looks quite cool (note that the pictures are before they were fully sanded to shape, they look even better now!)

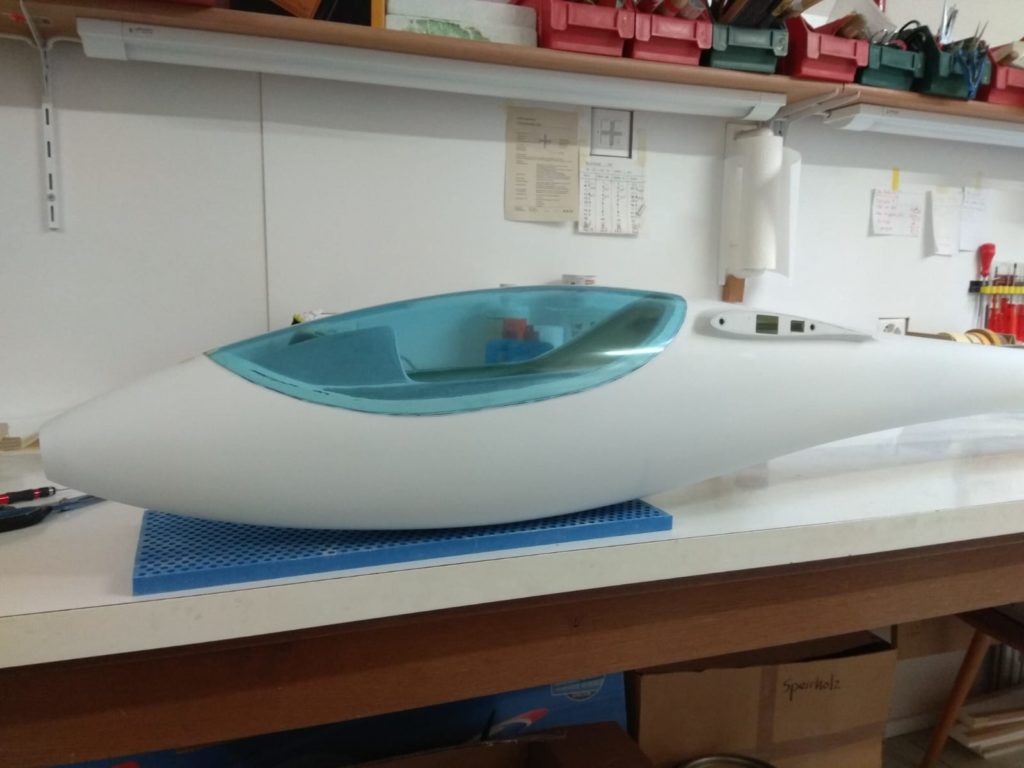
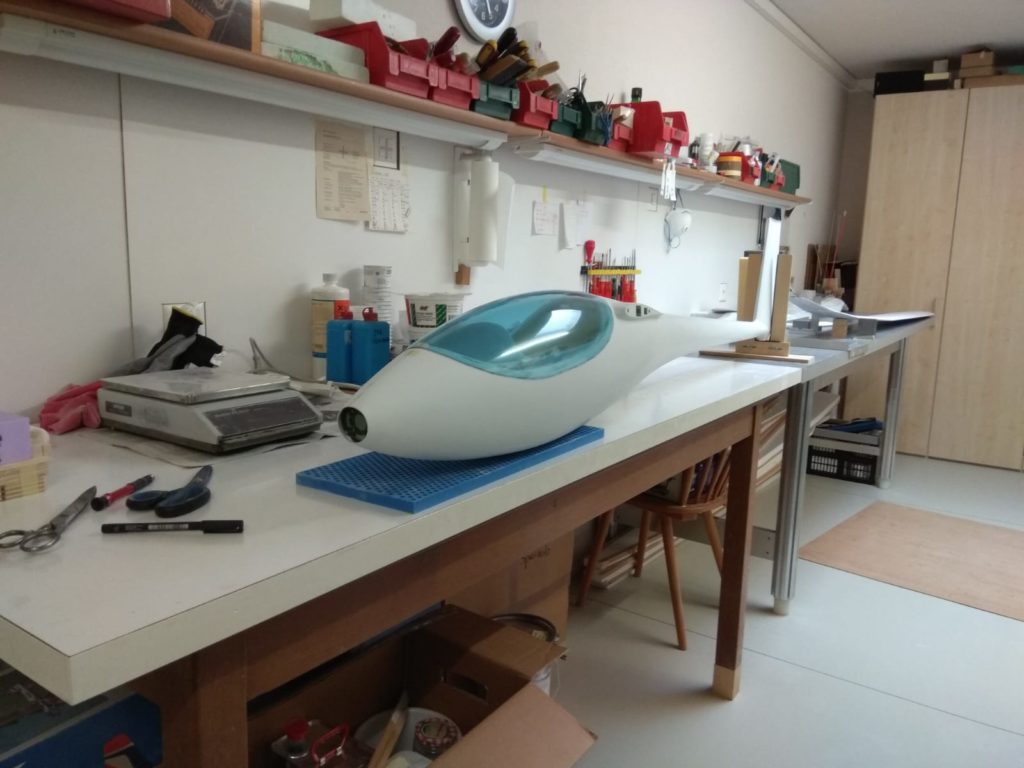
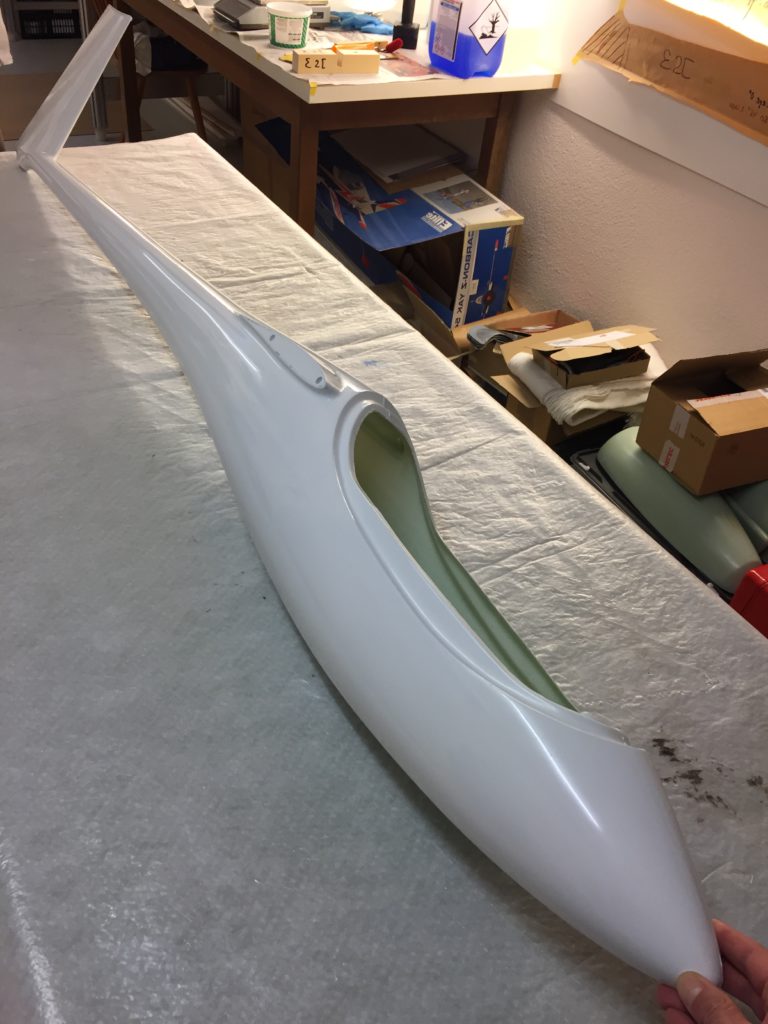
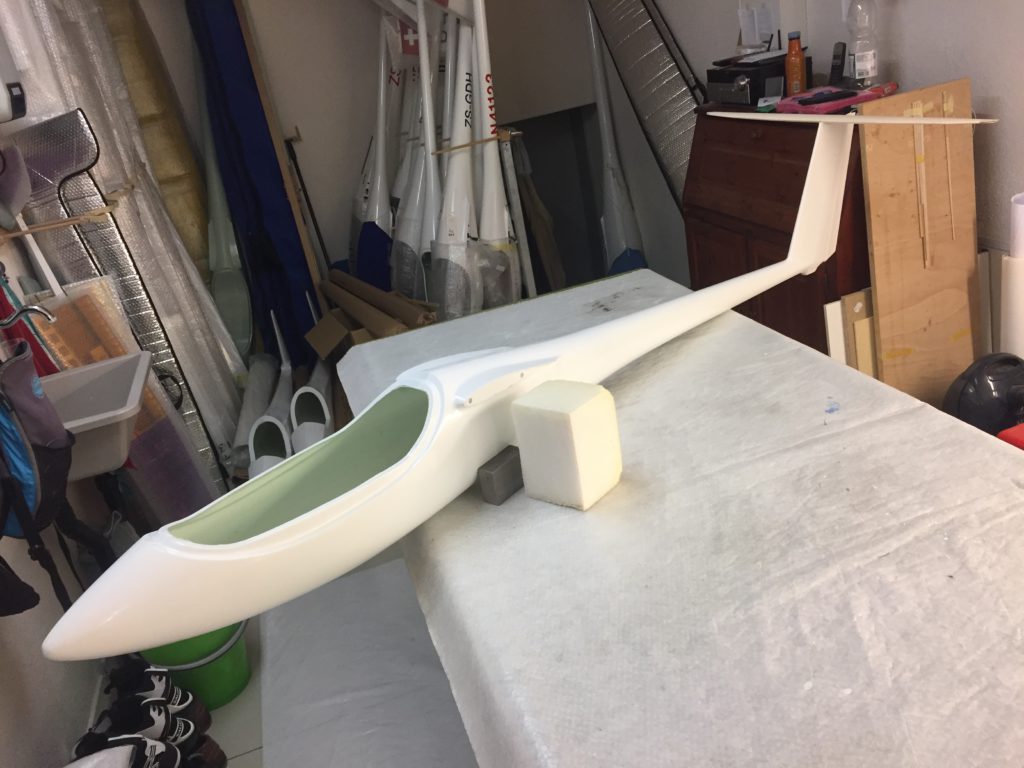
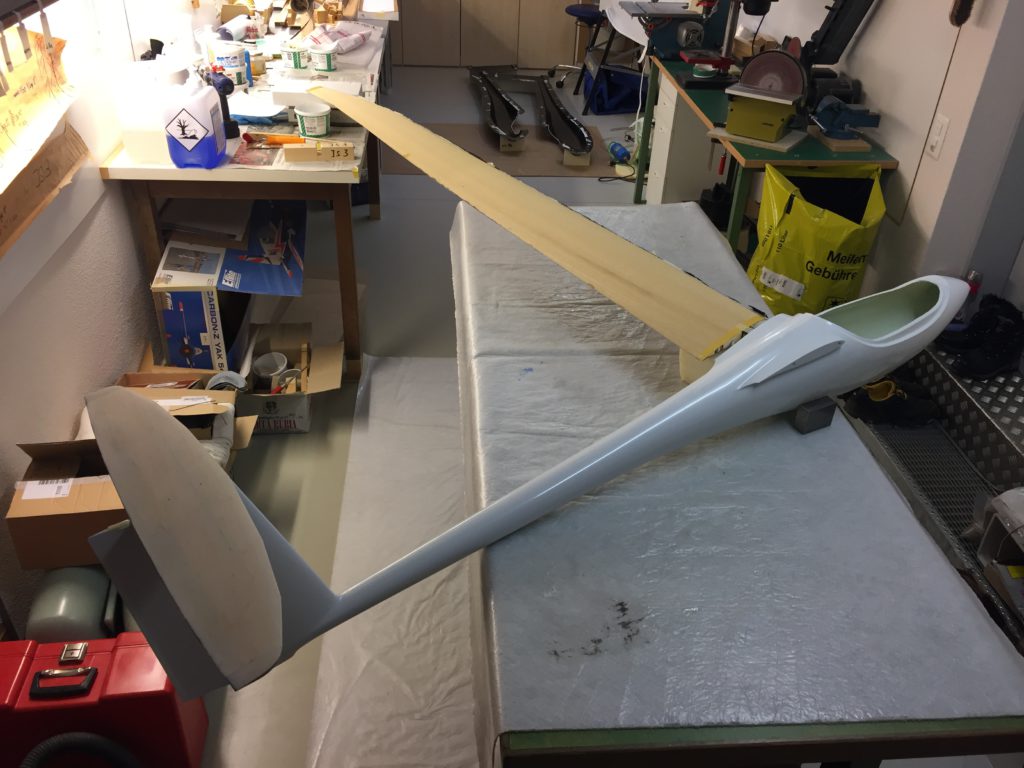
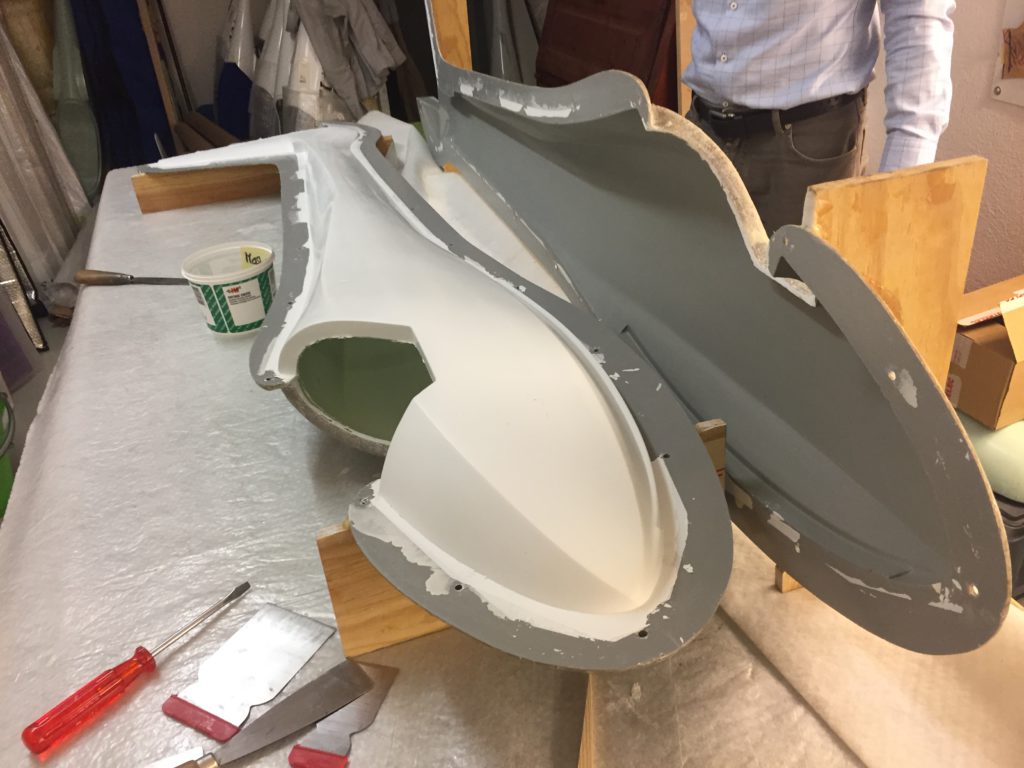
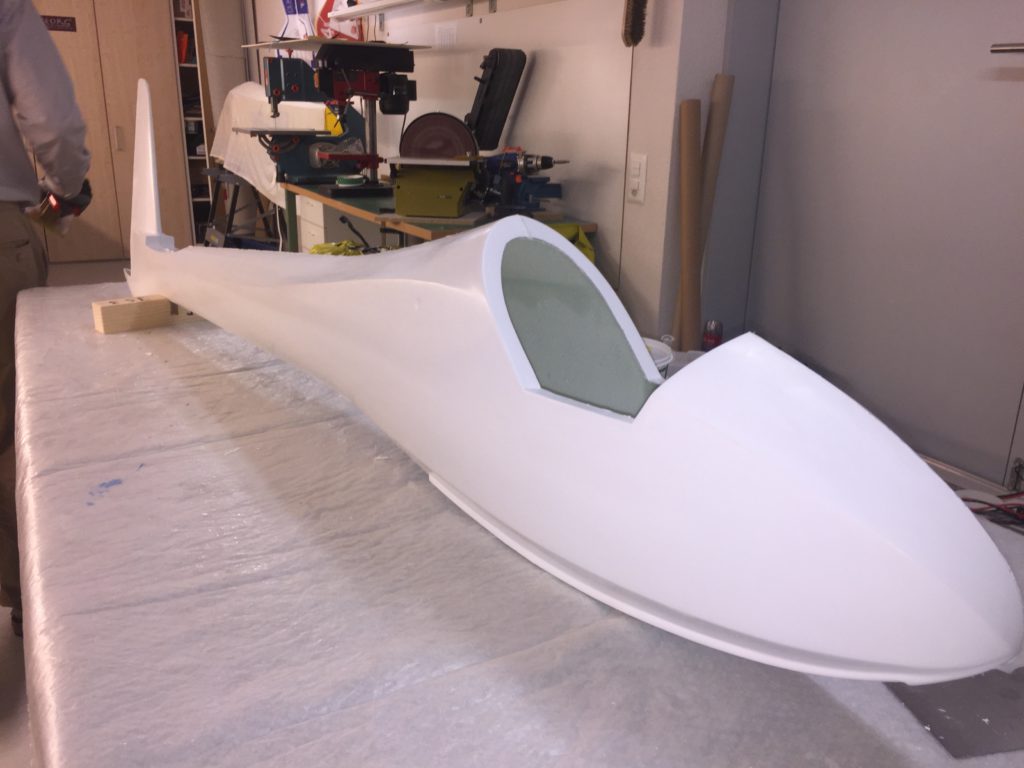
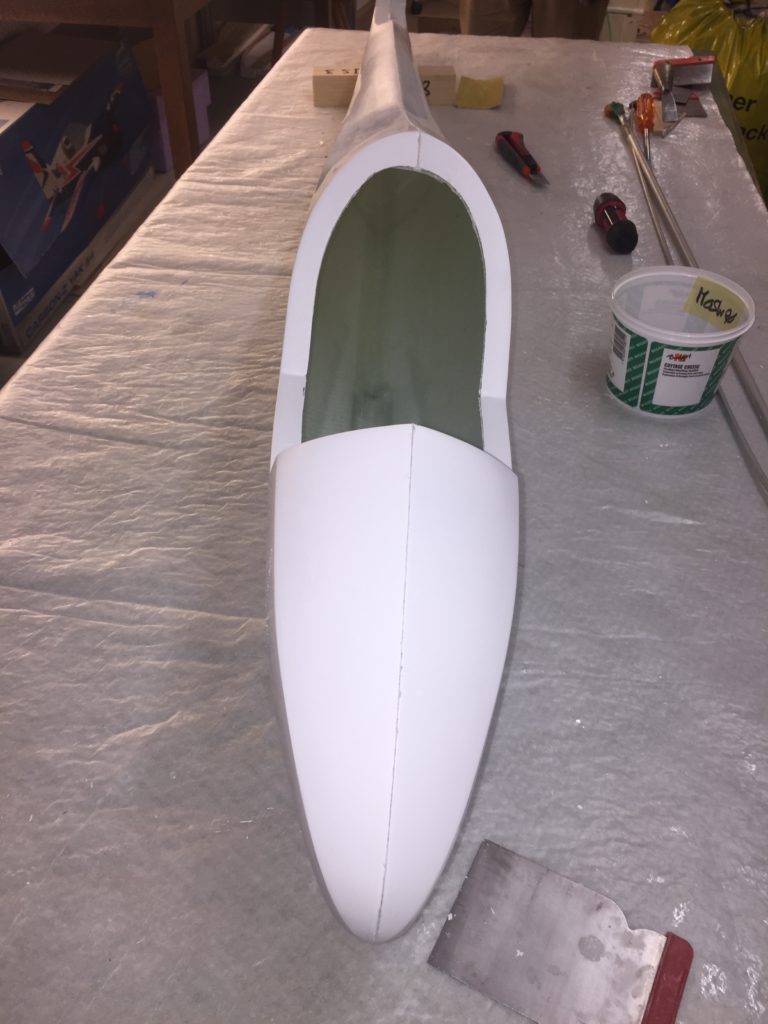
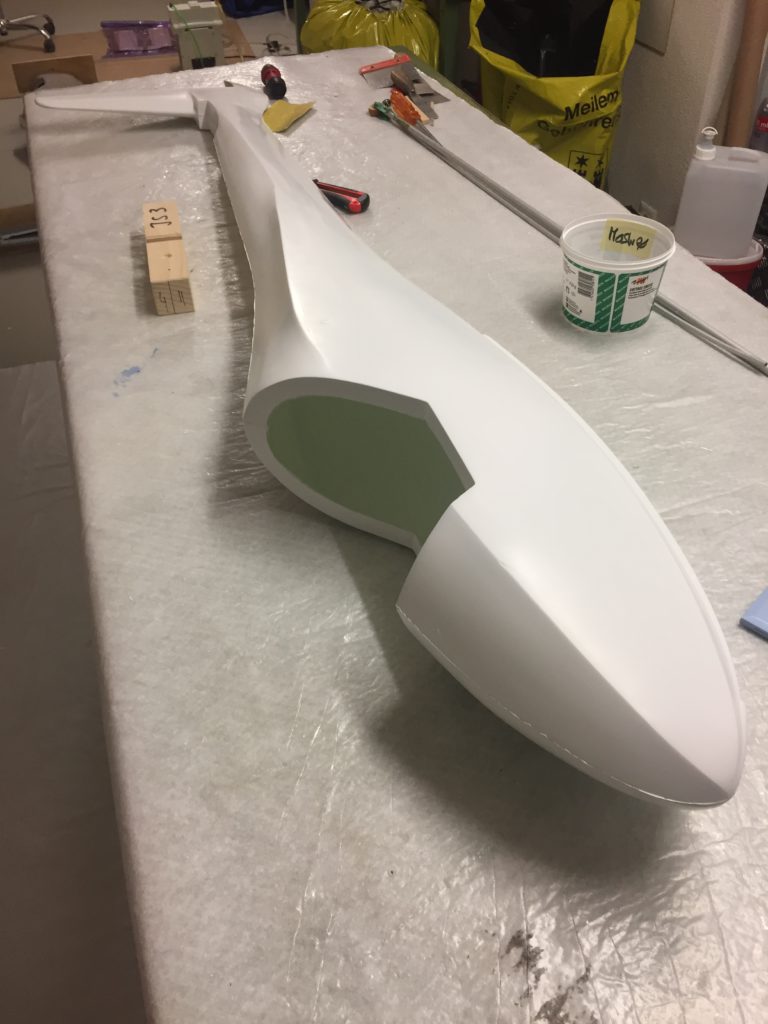
We also received the canopies, for which we produced the moulds a few months ago (see earlier posting). We’ve had a number of clear and light blue canopies produced (the original JS3 canopy is also light blue). Georg has already finished his canopy frame and the light blue canopy looks great (it’s a bit less blue in reality than on the picture). Georg’s JS3 is now ready to be fully spray painted in its final coating. I hope I can show some pictures of the fully assembled plane, freshly painted, shortly.


Work on the fuselages

Now that all fuselages have been produced it’s time to start fitting them with electronics and other bits and pieces. We’ve cut out the doors for the retractable gear and have started installation of the elevator and rudder. Georg helpfully produced a little tool to perfectly position the elevator screws, which works very well. For the landing gear doors we use our usual method, see picture below. This has proven to be very robust, in particular also for flying in alpine regions with high grass and uneven landing areas, where we hope to be flying our JS3. We’ve also started work on the cockpit frame, more on that later.


Wing cores and fuselages all done

I’m a bit behind on updating the blog, but work has progressed steadily since the last entry. We now finished building all fuselages and all wing cores. Last week we also produced an additional fuselage for a 1:3 scale Diana2, for which we built a mould several years ago. I’m still amazed that we managed to produce seven fuselages over the past two months or so (2x Moswey III, 4x JS3, 1x Diana 2). The plan is to use the new Diana2 fuselage to combine it with the Baudis 1:3 Diana2 wings (we don’t like the Baudis 1:3 fuselage, not “scale” enough). If this works well we’ll probably produce a few more fuses for members of our team in coming winter.

The wing cores turned out well, although a few wings had too little material at the wing joiner, which we will need to fill after sanding. Closing the wing roots with carbon (first time we do this) looks very cool. Now comes the long process of sanding, glass, primer and spraying, which will keep us busy for a while still.


More wing building…

Over the weekend we finished the cores for the third pair of wings. They also look very good. Excellent stiffness, and the weight difference between the two wings on the second pair is only 8 grammes and the two wings on the third pair only 5 grammes (on a total weight per wing of around 830 grammes).

Georg covered the first pair of wings in glass and yesterday cut off the outer wings and added the dihedral (V-shape) to the two outer wing segments. The system for the exchangeable outer wings that we built into the wing cores works great, both outer wings (4.28/15m and 5.14/18m) are a perfect fit, and the wings look just like the original. Hopefully we should be able to do a first fit of the full model in the next few days.


Wingbuilding – continued

Georg completed his wing cores a few weeks ago and has already advanced quite a bit with building the various components into the fuselage. More on that later. Andi and I have been working hard to complete the other three sets of wing cores. On Saturday we put the first pair of them together, and they look really awesome. See the pictures below.

Note that the outer two segments will become the 4.28/15m winglet and will therefore be cut off. Already built into the wing are the sleeves for a wing-joiner for the winglets with a 5 degrees dihedral (see earlier post). In addition, the last segment of the winglet will also be separated and obtain a dihedral. The dihedral at the wing root and the first inner segment are already in the wing cores, so the pictures show the wings with only part of the “V”-shape that they will have in their final version. Next step is to fit the wings to the fuselage, then sand them and cover them in glass fiber. Only then can we cut off the winglets and build in the dihedral, before coating the wings in primer and then spray painting them, with lots of sanding in between still.

Over the weekend we completed the second pair, and at the end of this week we hope to have all sets of cores ready. Each underside takes around 3hrs of preparation to cut out and install the wing spars and cables, and prepare the carbon fibers. Putting it together and placing it in a vacuum bag takes almost another two hours, and we can only do one wing at a time (we don’t have more space and only one vacuum pump).


IDS system for the wing control surfaces

I wrote earlier about our servos, but not in detail: we will be using KST X08plus for the ailerons on the outer wing of the 5.14/18m version, ChocoMotion 8/5.0 for the ailerons, and Chocomotion 10/9.2 (in size identical to the KST DS225MG, but more powerful) for the rest of the control surfaces (6 Servos in the 4.28/15m wing and 8 Servos in the 5.14/18m wing).

Today I received a large package from Servorahmen.de in the mail. Servorahmen.de provides servo frames with Integrated Drive System (IDS) for all the servo types we will be using. We have used their IDS system on most of our gliders in the past few years, including last year’s scratch-built Diana2 (1:3.5). The frames fit well, are robust and good value. The IDS system can be fully integrated into the wing, so no ugly protruding levers or large holes in the wing surfaces. Most importantly, they provide a wing surface control that is extremely direct and completely without play. Fitting the IDS frames requires more effort than standard systems, but the result is definitely worth it. Below are two pictures of the system built into my 1:3.5 (4.28m) Chocofly Diana2 that I hope to maiden soon. The Chocofly Diana2 is identical to my scratch-built Diana2 (which was designed by members in our team), except that the wings were built in a mould.


Underside of the wings and third fuselage

Last week we built the third fuselage, the best so far. The moulds are now ready to build the fourth and final one, which Georg and I will do at the end of next week.

In the meanwhile Andi (in the pictures) and I are still busy producing the three pairs of wings. Today we finished and bagged the first of six wing undersides. As we already prepared all six wings (cutting the openings for the wing spars, cutting carbon fibers, inserting cables etc.) it takes around 2-3 hour per wing do close it up. Most work is putting in the carbon rovings, both below and on top of the main wing spar. We pull these through a syringe filled with epoxy resin, and then cut them to the right length. At the base of the wing we have 2 x 24 rovings, gradually reducing to 2 x 1 roving at the wing tip. Tomorrow Andi will take it out of the vacuum bag.


“Mass Production”

Not much to show in terms of new pictures this week. But a lot happened. On Monday Georg and I produced the second JS3 fuselage. It was released from the mould yesterday and looks very good. The moulds are already waxed again and waiting to be spray painted by Andi tomorrow. On Monday we will build fuselage nr. 3.

In the meanwhile Andi and I have been busy building three sets of wings. We’ve finished the top sides of all six wings. We have also prepared the lower side of five wings (cutting out and preparing wing spars, laying out wiring, cutting carbon cloth), so we can now apply resin, close the lower side and then bag them in vacuum. We do this one by one (small workshop and only one vacuum pump), which takes almost 3 hours per wing, after which we wait at least twelve hours to release the wings from vacuum.

Georg has already finished his wing cores (see earlier post). This week he produced another rudder (nr. 3) and started preparatory work and tools for the fuselage and the winglets. Now that his fuselage is ready he can soon start fitting the wings, after which they will be sanded, covered in glass and then cut and re-joined to apply the dihedral at the wingtips, and to enable the outer wings to be swapped out (for the 4.28 and 5.14m versions).

In between I’ve been trying out building the cockpit panel (grey coloured glass on 2mm wood) and did some work preparing the decals. But one of the coolest things is the Polo Shirts which are ready and which I picked up today. Now all we need is the glider to go with the shirts :-).


Choosing the electronics

Yesterday we went to see Urs Leodolter at Leomotion.com to select and purchase our electronics. All the gliders built by members of our team in the last few year are equipped with electric components supplied by Leomotion. His electric engines are just great, and his support with choosing the best engine and components is unmatched. Together with Chocofly he now has his own Chocomotion servo range. We tested the 8mm and the retractable gear servos on the pre-production version of the new 1:3.5 Chocofly Diana2 in autumn last year and really liked them (this Diana2 is actually the commercial version of a previous development by members of our team, still the best plane I’ve ever flown). The retractable gear servo has plenty of power and automatically powers down as soon as it draws more than 2.3A (very useful when the landing gear is stuck). The 8mm servos also very powerful and precise with good centering. So we decided to go for Chocomotion servos, with the exception of the elevator, where we went for the ever faithful Futaba 3174, and the outer ailerons on the 5.14m (18m) outer wings, where we took the brand new and very powerful KST X08Plus.

Three of our planes will have an electric engine. This is simply because we like to go flying very often, our club’s airfield is too small for aerotowing and thermals usually only start from 80m upwards. Richie flies with another club which has an airfield up on a slope where he has more options to fly without an engine. And he is the best at landing his gliders way out in the valley, almost out of sight, when thermals fail (and likes long walks!). We will install an outrunner engine, as the fuselage is just about large enough to accommodate one. ESC will be a Castle Phoenix Lite 100, which never fails and is a dream to install and program. We will use the power supply from the ESC, but backed up by a backup power supply that was developed within our club (with and 1800 LiFe battery that automatically recharges from the power train’s LiPos and provides backup power as soon as the power supply drops below 7v).

The retractable gear is one that was also developed within our club and of which we had quite a few built. Unfortunately we’re almost running out, but Chocofly is developing a new gear that we hope can succeed it.


Building the wings

Georg, who designed the wings for us, is ready with the core of the wings of his JS3. Andi and I are now using the detailed plan and tools he made to build three further sets of wings for the other three members of our team. Quite a bit of work. The foam cores were cut a while ago already. The next step is to prepare the thin abachi boards for the upper side of the wings, as well as the carbon fiber and kevlar inlays for the upper side (we always build the wings with the upper side down). Then we apply epoxy resin to the abachi and carbon inlays (we use 54gr for the upper side, of which about 2/3 remains in the wing), insert the wing cores and place the whole thing in a vacuum bag for 12 hours. We do this separately for each wing. Once the upper sides are finished, we build in the wing spars (different types of carbon and different types of foam cores for each spar), wiring and wing joiners (outer wings, winglets and main wing joiner), as well as thickened resin for front of the wing and to level out the underside of the wing. Then we close the whole thing up again with an abachi board which has the carbon fiber and kevlar inlays already applied with resin (wet in wet). We then put on the foam moulds of the underside and again place the whole thing in vacuum, again separately for each wing. Preparing the underside of the wings is most work, it takes around 4-5 hours to prepare the wing spars and different carbon inlays for a single wing. This will keep Andi and myself busy over the next few weeks, as we try to squeeze this between our other tasks. In parallel Georg and I will try to build one fuselage (we still need three) every second week or so (we leave the fuselage in the mould for 4-5 days to dry out after each build to avoid the glass structure coming through the paint, waxing takes another few days and then it needs to be spray painted before we can start the next build).


First JS3 Fuselage released from the Mould

This morning we released the first JS3 fuselage from the moulds. Stunning. It turned out very well, right stiffness and weighing only 1122 grammes. We only have a few bubbles under the paint that can be easily fixed, and will be invisible once Andi sprays the fuselage once more to hide the seams. We couldn’t help fitting the elevator, rudder and the right wing that Georg unbagged yesterday to dream what the full plane will look like. This is going to be one very beautiful glider.


First full wing unbagged

Georg released his first wing from the vacuum bag. It’s the 15m (4.28m) version with outer wing attached. The wing has excellent torsional stiffness thanks to the carbon spars and D-box. Weight is less than 750 grammes, so that means we should be around one kilo when the wing is ready to fly. The first dihedral on the inner part of the wing is already in the wing (taken into account when we cut the foam). After a first sanding it will be cut in two places to get the two additional dihedrals, one of which will also make the outer wing part exchangeable with the 18m(5.14m) outer wings that we built earlier. The wing joiners are already built (see earlier post) and the sleeves for the wing joiner for the outer wing are already glued into the wing. Next step will be to cuts the wing in three, fit the right dihedral, and fit the wings to the fuselage. After that the wings will be covered in glass, sanded, primer, sanded, and then Andi will spray paint the wings. Once that’s done we can cut out the rudders and servo openings. A lot of work ahead still. This week will be “wing building” week, when Andi and I will start on the three other sets of wings, using Georg’s plans and indications for materials to be used.


First rudder and second Moswey Fuse, and preparing for the first JS3 Fuselage…

On Friday Andi spray painted the JS3 and Moswey III fuselage moulds, as well as the rudder mould, so we can start building fuselages and a JS3 rudder again.

Today Georg and I built the second Moswey III fuselage, trying to improve our technique and using quite a bit less time than we needed for the last fuse. On Wednesday we plan to build our first JS3 fuselage. In the meanwhile Georg has finished the first rudder, which came out not too bad, and has started the second rudder over the weekend. Georg has also made good progress on preparing the main wings of his JS3, the core of which should be ready over the next few days.


Moswey III fuselage practice run – the result

This afternoon we opened the Moswey III forms, to see the result of our first “fuse building” practice run. The halves separated well, and a beautiful Moswey III fuselage emerged. We spotted only a few smaller bubbles, but none on critical/visible spots. The fuselage weighs 1.05kgs and will only need a bit of paint to hide the seams. Very happy with the result. Now it’s back to waxing and spray painting, and hopefully we can do another practice run the week after next.


JS3 fuselage moulds are ready!

That was an exciting and satisfying morning. Georg and I separated the Fuselage moulds that we built on Monday and took out the fuselage shape. The moulds separated very well, and the quality of the moulds is excellent. Only little sanding and polishing was needed to bring them to almost flawless shine. Now we need to wax the moulds to that Andi can spray them with gelcoat before we start building the first fuselage. We hope to build the first fuselage out of these moulds in about two weeks from now. First we will do another Moswey III fuselage, to be sure that we have enough practice to push out four good looking JS3 fuselages in the next few months.