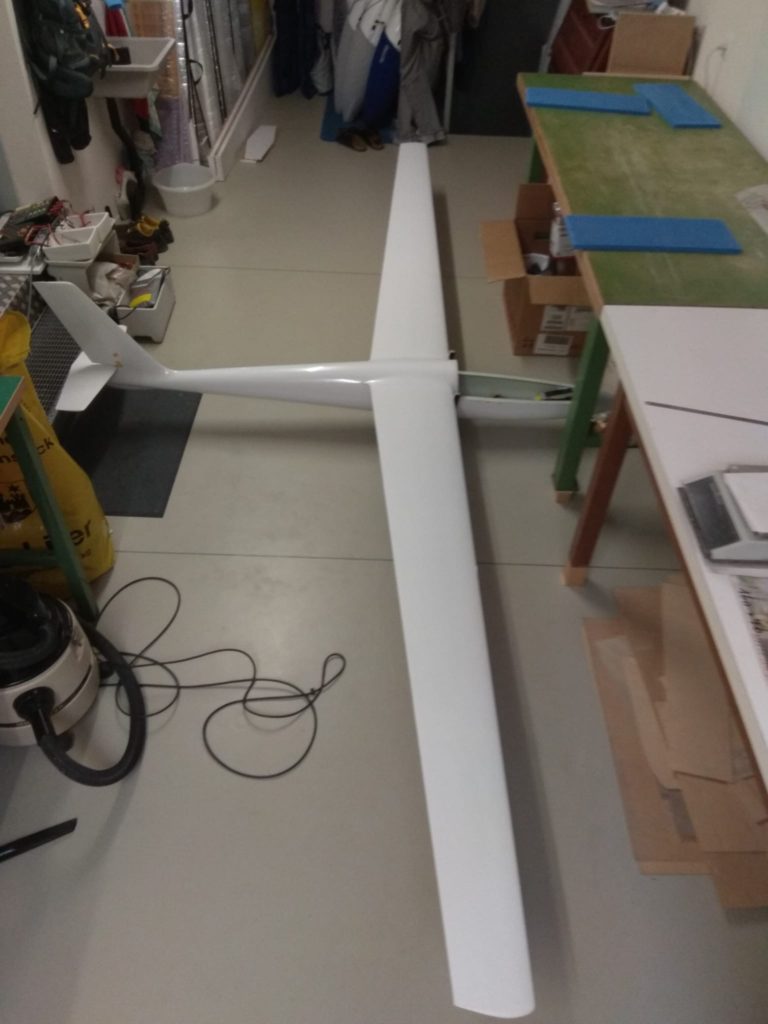
Urupema: covering wings with glass and building canopy frame

After giving the wings a final fit, filling some minor uneven surfaces on the lower side of the wing with polyester putty, the next step is covering the wings and elevator with 49gr glass fiber (lower side of the wings first). Before doing so we apply a watery primer (to avoid too much resin being absorbed by the abachi wood), which is slightly sanded and then the wing is wiped clean of all dust. The 49gr glass is applied with a roller and resin that has white colorant added as well as around 15% methanol (50gr resin, then add hardener etc. per wing). The methanol makes the resin very watery and easy to apply using the roller (and an old teflon frying pan).

I also finished the canopy frame and started builing the “lock”. The canopy frame looks quite good already, but will need a layer of filler before I can spray paint it. It was built by applying tape around the canopy base and two coats of liquid wax on theĀ  areas where the canopy frame is lying on the fuselage. The frame is then built using first a bit of thickened epoxy (with micro-balloons and a bit of aerosil), then adding a bunch of carbon fibers. It is then further “filled out” with thickened epoxy. After giving it a rest of a few hours, allowing it to harden out a bit, I first rolled the upper side of the frame (after first applying cling film), to even out the top surface. I then filled any small uneven bits with thickened epoxy again and applied two layers of glass (280gr and then 160gr), and allowed it to harden out like that.


Urupema landing gear assembly

We wanted our Urupema to have a landing gear with suspension (as we often fly on pretty rough alpine slopes). Georg designed it, and Richie built the mould for the cover. We spent a lot of time sourcing the right size of the various bits and pieces. The sides are made of 5mm glass fiber. A friend was able to mill the glass fiber sides on the basis of our drawing, and another friend helped us thread and cut aluminium parts to size. Today I assembled my landing gear. Fits perfectly.


Urupema: motor bulkhead done and wings, rudder and elevator first fit

Last week we built my second wing, it came out of the bag very nicely. Georg also built the rudder of my Urupema (in the mould). I spent a few hours sanding the abachi wood of the elevator and wings, and had a first fit. I also cut off the nose and installed the bulkhead for the motor, which also worked well.

Pretty excited, this is going to be a beauty. A lot of work to be done still though, experience says that once the wings are fit it’s about a third of the work done. But I hope to have my Urupema airborne by early June.


Georg’s Urupema

While I’m still working on the wings of my Urupema, and Andi is working on the fuselage of his, our “Master Builder” Georg has been making excellent progress on his. He’s finished the rudder (with Rotational Drive System – RDS) and elevator installation and his plane is just about ready to be spray painted. It looks awesome.

We also got most of the parts of the landing gear together, including some bits that were cnc milled by a colleague. I’ll need to do some work on the missing bits today.

Georg also checked the weight of his Urupema. He’s expecting a take-odd weight of around 6300 gr., which means 63 gr/dm2. With the ballast in the chambers it will be around 78 gr. /dm2. Another plane that will be great both for thermals and heavier slope work.


Urupema decals

In the meanwhile I’ve also been searching the web for Urupema pictures to help decide what we want our Urupemas to look like. As the plane was built in so many version, with so many different decals we’ve decided that we have a bit of liberty with this, but will allow ourselves to be inspired by the version that’s most photographed on the internet (see for instance here). We will go for a Brazilian design. I’ve identified the fonts of both the logo under the cockpit (Microgramma bold-extend) and the registration number (Bahnschrift Semibold Condensed) and done a first design of what our decals can look like. We now need to decide on the registration numbers we want to use. I’ve also ordered a couple of Brazilian flag stickers, which we may stick to the tail fin if they look nice enough. Note that the below file links through to the PDF version of the graphics, which are free for anybody to use.


Urupema build progress – wings

It’s been a while since the last update on our Urupema build, and a lot has happened. We finished building the four fuselages (Georg and Andi pushed out the last three while I was on vacation). Two sets of wings are done. Andi and I have been working on the third set of wings (mine) over the past week. Yesterday we bagged the first, which came out very well. We hope to bag the second wing of my Urupema sometime next week. We’ve been using 160gr carbon biax cloth for the full surface of the wing (top and bottom), in addition to progressive carbon rovings (37 at the top and bottom for the first 10cm, reduced to one at full length of the wing), and of course the usual carbon sock around the wing spar and control surface hinges. We’re also building ballast chambers on both sides of the wing joiner. The result is an incredibly stiff wing, with a nice flexibility at the tips, exactly how we wanted it.


First Urupema Fuselage

On Monday we built the first fuselage of our 4.28m EMB400 Urupema from our new mould, and took it out of the mould this morning. The first fuselage out of a new mould is always the most difficult one. While the fuselage looks great, we made a few small mistakes during production and it isn’t perfect. But since we will spray it anyway to hide the seam we can easily correct those mistakes. We’re pretty happy with the result, especially the last picture below where we fitted the plug for the rudder and the elevator. The next fuselage will be better still. Three more to go….


Urupema Parts (electronics and servo mounts)

On Monday we had a team discussion on which electronics and servo mounts to use for our Urupema and ordered the parts on Monday afternoon.

Our electronics we always get at leomotion.com. We’re fortunate that their shop is a short drive from where we live, and Urs and his team offer excellent advise and service. Richie will, as always, build his Urupema without motor. The rest of us have opted for the newer version (Dualsky XM5060EA-14 KV340) of the same outrunner that we’ve been using for the JS3 (and in my SZD54, AvantiHawk and Taranis). It’s very powerful, extremely silent and good value. The only change is that we’ll be using the new “scale” propeller from GM (18×10 Scale), which should fit even better with the fuselage than the version we used on our JS3 (where we used an 18×13). For the servos we use the powerful Chocomotion/Fox 8 and 10mm (wing) and the 12mm (tow release). Elevator will be expensive but virtually indestructible MKS 6130. For our rudder we will use the trusted old Futaba 3174 with the Leomotion RDS adapter (rudder will be operated through RDS, more on that later). ESC will again be using the Castle Phoenix Edge 100 Light, which always works and is a breeze to program. We’re waiting for the new 43mm spinner from RFM with a slightly wider prop mount which should look better with the new GM props.

For our servo mounts and wing surface control we again went for the IDS system from servorahmen.de, which we ordered directly with them. We’ve been using Florian’s system for our past few builds and really like it. While a bit fiddlier to install than the “classical” system with clevises, the ability to build it almost entirely within the wing is aesthetically pleasing. It’s also very rigid, without any play on the system itself. The only “disadvantages” are that it needs quite strong servos (but the Chocomotion servos have plenty power) and when the wings are very thin it’s better to make your own control horn at the side of the wing control surface to ensure that the servo has enough leverage.

Oh, and the Urupema moulds have been polished to a shine, with six coats of wax and are waiting to be painted so we can build our first fuselage hopefully in the coming week.


Urupema fuselage mould

This morning we separated the Urupema fuselage mould, removing the plug. The two halves separated well, the mould is perfect. This afternoon we’ll polish the mould halves. After that Georg will add a few layers of wax, so that Andi can spray paint the coating and Georg and I can build the first fuselage next week.


Urupema – Fuselage Mould and Wings

Today we finished the 2nd half of the mould for the fuselage of our Urupema. Fingers crossed that the halves will separate and that the plug will come out well. In the meanwhile we’ve been working hard on the wings. All eight upper sides are now finished and the wing joiners and wing joiner tubes prepared. Georg will start with the underside of his pair of wings in the next few days. He’s also built first wheel encasement and is working on the first rudder (both built in the mould). More on that later.


Urupema – wings and preparing for fuselage mould

After last week’s styro cutting we have now started building the wings. Georg is building his own, Andi and I are building the other three pairs. Today Andi and I bagged the upper side of wing nr.1 (out of 6), having prepared all the styro cores and abachi inlays yesterday. As you can see on the pictures we are going for a full carbon layup (between styro and abachi, 160gr inner side of the wing, 100gr outer side of the wing, with an extra 160gr inlay in the area of the wing joiner and an extra 100gr layer underneath the servos.

In the meanwhile Georg has finished the upper sides of his wings and has worked hard on preparing the plug for building the fuselage mould. With a bit of luck we should be able to build the first half of the mould this week still.


And in the meanwhile Project Urupema is picking up speed

In parallel to finishing my JS3 we’ve been making good progress on the Urupema project. Georg has made the moulds for the rudder and wheel encasing. Last week we finished the stamp for the canopy. Today we finished cutting the foam for the wings (four pairs!). In the meanwhile I’ve been building wing joiners and Andi and Georg have been busy producing four horizontal stabilisers. Next step is building the wings and the moulds for the fuselage.


Urupema Moulds

After a summer with some great flying the weather has now definitely turned autumn, which means time to head back to the workshop. Georg has started work on the smaller moulds for the Urupema project. We need moulds for the canopy, rudder, wheel encasing and of course the fuselage. Work on the first three is well advanced, and Georg has also started on the wing joiner and ballast pockets (last picture). Georg and I will be doing the mould for the fuselage in January. In the next few weeks we also expect to start work on the wings and elevator, which we will be doing in our usual styro core with carbon, abachi, glass and then spray painted. Georg has chosen an extremely thin wing profile….an interesting experiment. It should be quite a fast plane :-).


Urupema Plug ready

It’s been a while since my last post. The fantastic weather so far has meant little time in the workshop and a lot of time flying. Unfortunately I badly damaged my AvantiHawk in a bad launch in Hahnenmoos, which has meant quite a few hours of work fixing it. It should be airborne again soon. In the meanwhile Richie has been working hard on the Plug for the Urupema. It’s now ready, see pictures below. The plug is now with Georg for the next step: the moulds for the canopy, plug and wheel cover. Georg will be doing the preparatory work over the next few weeks. As soon as we have one or more days of rain we will get started on the canopy mould.


Urupema plug progress

While I’m struggling to find time to finish my Baudis Diana2, and still have a lot of work on my JS3, members of our team are making good progress on our new project, the Embraer EMB400 Urupema. Richie, our shaper, has finished the rough shape of the plug for the fuselage. Georg finished building the elevator, and has now started the careful and extremely important work of positioning elevator and wings on the plug. After that Richie will put another layer of glass over the plug, add filler and start the final sanding and polishing. Then Georg and I will build the moulds.


Urupema Fuselage Plug taking shape

Our fuselage shaper Richie has been working hard on getting the fuselage plug into shape. It’s starting to look like the real thing. Over the next few days Georg will finalise the elevator design and we will start cutting the foam cores of the elevator, after which Georg will build a first elevator, so that Richie can use it to finalise the fuselage plug. Georg has also started the design of the wings. More on that later….


Start of the next project….Embraer 400 Urupema

Although I still have enough work on my JS3 and AvantiHawk to keep me busy for a while (and there’s a Moswey III waiting to be finished as well), work has started on the next project. The same team that built the JS3 has decided to have a go at a 1:3.5 scale version of the Embraer 400 Urupema. It’s a Brazilian glider that was designed in the mid-1960s and that maidened in 1968. We got hold of some (very) rudimentary plans. Our shaper, Richie, has started work on the fuselage plug, using the rudder that Georg designed and that Georg and I cut a few weeks ago. We’re not a in a hurry, and it will take a while still until we can start work on the moulds, but it’s exciting to see the new project taking shape!